Cow Manure To Fertilizer
Cow Manure To Fertilizer
The primary difference is that manure is a natural, organic substance derived from animal waste or plant matter, while fertilizer is a broad term that often refers to human-made or synthetic chemicals designed to supply specific nutrients
Cow manure is a powerful organic resource that can be transformed into nutrient-rich fertilizer through composting or liquid preparation. While it is lower in nitrogen than poultry manure, it is prized for significantly improving soil structure and moisture retention.
To safely obtain fertilizer from cow manure, you must process it to remove pathogens and weed seeds. Fresh manure contains ammonia and salts that can “burn” plant roots. The two most common methods are composting (for solid fertilizer) and fermentation (for liquid fertilizer)
Why You Must Process It First
You should never use fresh cow manure directly on your garden for several reasons:
- Nutrient Burn: Fresh manure contains high levels of ammonia that can “burn” delicate plant roots.
- Pathogens: Raw dung may carry dangerous bacteria like E. coli and salmonella.
- Weed Seeds: Composting reaches temperatures high enough (at least 60C) to kill invasive weed seeds that often pass through a cow’s digestive system.
1-Solid Compost Fertilizer
Solid Compost Fertilizer is the best method for long-term soil health and structure.
- Mix Materials: Combine cow manure with “brown” carbon-rich materials like straw, sawdust, or dry leaves. A common ratio is 1/3 manure to 2/3 brown materials.
- Adjust Moisture: The pile should be moist but not soggy (like a wrung-out sponge), ideally around 50–60% moisture.
- Build a Pile: Stack the mixture in a heap or long rows (windrows) at least 3 feet high to allow it to generate heat.
- Turn Regularly: Use a pitchfork or compost turner to mix the pile every 3 to 10 days. This introduces oxygen, which feeds beneficial microbes and speeds up decomposition.
- Monitor Heat: The center should reach 131°F to 170°F for at least 15 days to kill dangerous bacteria like E. coli and weed seeds.
- Curing: Once the pile stops heating up and smells like earthy soil, let it “cure” for 3 to 6 months before use
2. Liquid Fertilizer (Manure Tea)
This provides a faster nutrient boost and is easier to apply to large areas.
- Submerge Manure: Place fresh or dry cow manure in a porous sack (like a burlap bag) and submerge it in a drum of water.
- Fermentation: Let it sit in a shaded spot for 1 to 4 weeks.
- Tip: Adding a small amount of molasses or jaggery can speed up the process by feeding beneficial bacteria.
- Dilute and Apply: The resulting liquid is highly concentrated. Always dilute it with water (commonly 1 part fertilizer to 10 parts water) until it looks like weak tea before pouring it at the base of plants
Methods to Create Fertilizer
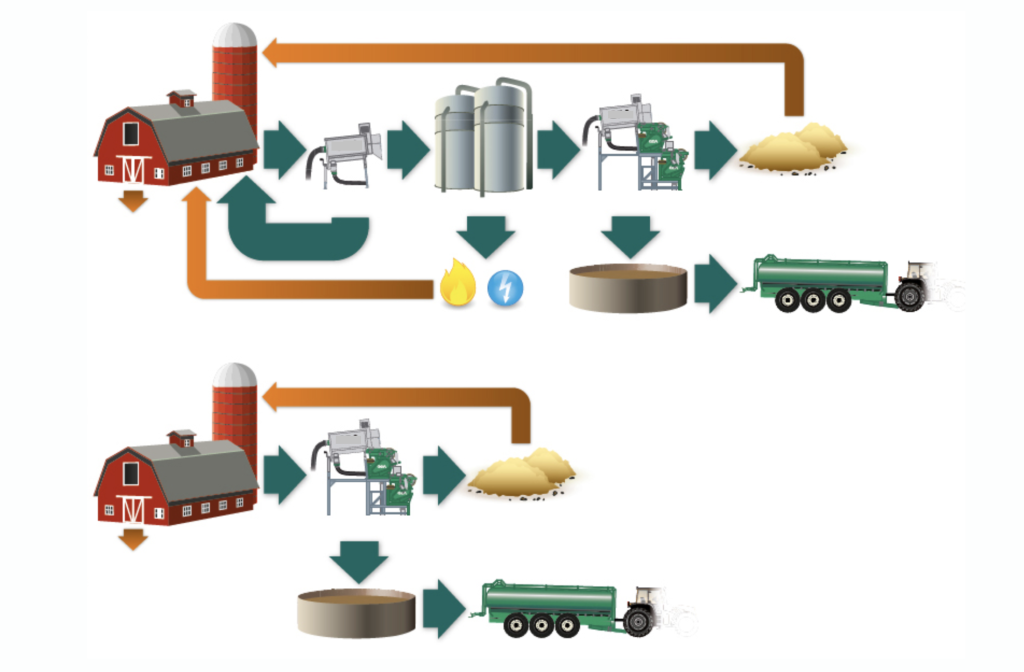
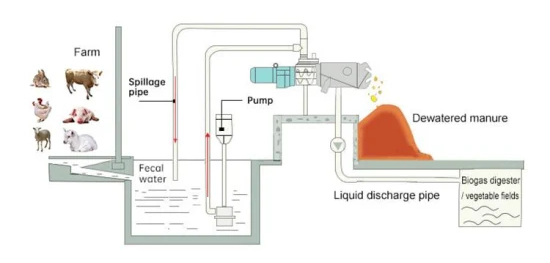
Before deciding which methods to use we must Collect and Separate manure to liquids and solids. Manure separators are also manure dryers or De-hydrators.
1. Traditional Composting (3–6 Months)
This is the most common method for creating a solid soil conditioner.
- Gather Materials: Collect manure and mix it with “browns” (carbon-rich materials like straw, dried leaves, or sawdust) to balance the nitrogen.
- Maintain Moisture: Keep the pile as damp as a wrung-out sponge (50%–60% moisture).
- Turn Regularly: Use a pitchfork to turn the pile every 7–14 days to provide oxygen, which speeds up decomposition and reduces odors.
- Wait for Maturity: The compost is ready when it is dark, crumbly, and smells like fresh earth rather than manure.
2. Liquid Fertilizer (Cow Manure “Tea”)
This works quickly to provide a nutrient boost to growing plants.
- The Soak: Fill a bucket or drum halfway with aged cow manure and the rest with water.
- Ferment: Let it sit for 7–14 days, stirring every few days to oxygenate it.
- Dilute & Apply: Strain the liquid and dilute it with fresh water (typically 1 part tea to 10 parts water) before pouring it around the base of your plants.
3. Vermicomposting (Worm Farming)
- Feed compost worms (like Red Wigglers) aged cow manure. They digest it and turn it into worm castings, which are extremely nutrient-dense and bioavailable for plants
Application Tips
- Quantity: A general rule is to spread about 40 pounds per 100 square feet of garden space.
- Incorporation: Work the manure into the top 6–9 inches of soil to ensure nutrients reach the root zone.
- Timing: Apply well-rotted manure in the spring. If you must use fresh manure, apply it only in the fall so it can break down over winter before planting.
For bulk needs, you can often find local sources for free or low cost on platforms like Marketplace, or purchase pre-composted bags from retailers.
Processing Cow Manure
Processing cow manure into fertilizer is essential to kill harmful pathogens like E. coli and salmonella, eliminate weed seeds, and stabilize nutrients to prevent plant “burn”
1. Preparation and Moisture Adjustment
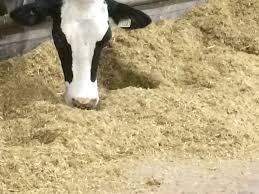
- Collection: Gather fresh cow manure from healthy, grass-fed or grain-fed cows, ideally storing it in a shaded or covered area to prevent nutrient loss from rain.
- Moisture Control: Fresh manure is typically 70–80% moisture, but optimal composting requires 50–60%. Use a [solid-liquid dewatering machine](https://organicfertilizermachine.com/eco-solutions/how-to-make-cow-dung-organic-fertilizer) for large volumes or mix in dry “brown” materials like straw, sawdust, or shredded cardboard for smaller batches.
- Carbon-to-Nitrogen (C:N) Balancing: Aim for a ratio of 25:1 to 30:1. A general rule of thumb is mixing 3 parts brown materials (carbon) to 1 part manure (nitrogen) by volume.
2. Composting (Fermentation)
- Pile Setup: Create a heap at least 3 feet high and wide to retain heat. Small-scale gardeners can use porous composting for better aeration.
- Heating Phase: The pile should naturally heat up to 130–160°F (54–71°C) within the first few weeks. This “thermophilic” stage is critical for killing pathogens and weed seeds.
- Aeration (Turning): Turn the pile every 3–5 days during the high-temperature phase to distribute oxygen and heat evenly. For large-scale operations, use a [windrow compost turner]https://youtu.be/qHcz2VF7CIs?si=EPxDNUWsyuh2ffND .
- Monitoring: Use the “squeeze test”—a handful of compost should feel like a damp sponge and release only a few drops when squeezed.
3. Maturation and Curing
- Cooling Phase: After about 4–6 weeks, the temperature will drop to 70–90°F. Turn it less frequently (every 1–2 weeks).
- Curing: Allow the compost to sit for an additional 2–4 months (up to 6 months for vegetable gardens) to fully stabilize.
- Testing Readiness: Finished compost is dark, crumbly, and has an earthy smell without any traces of ammonia or raw manure.
4. Application Techniques
- Soil Incorporation: Mix composted manure into the top 6–12 inches of soil before planting.
- Top Dressing: Apply a thin layer (0.5 to 1 inch) around established plants and water thoroughly.
- Liquid Fertilizer (Compost Tea): Soak compost in water (roughly 1:5 ratio) for several days, then dilute the resulting liquid (10 parts water to 1 part tea) to use as a foliar spray or soil drench.
Safety Precautions
- PPE: Always wear gloves, long sleeves, and a dust mask when handling manure to avoid contact with bacteria and lung irritation from dust.
- Timing: If using un composted manure, apply it at least 90–120 days before harvesting edible crops to minimize foodborne illness risks.
- Storage: Keep compost away from water sources and covered with a tarp to prevent nutrient runoff into local waterways.
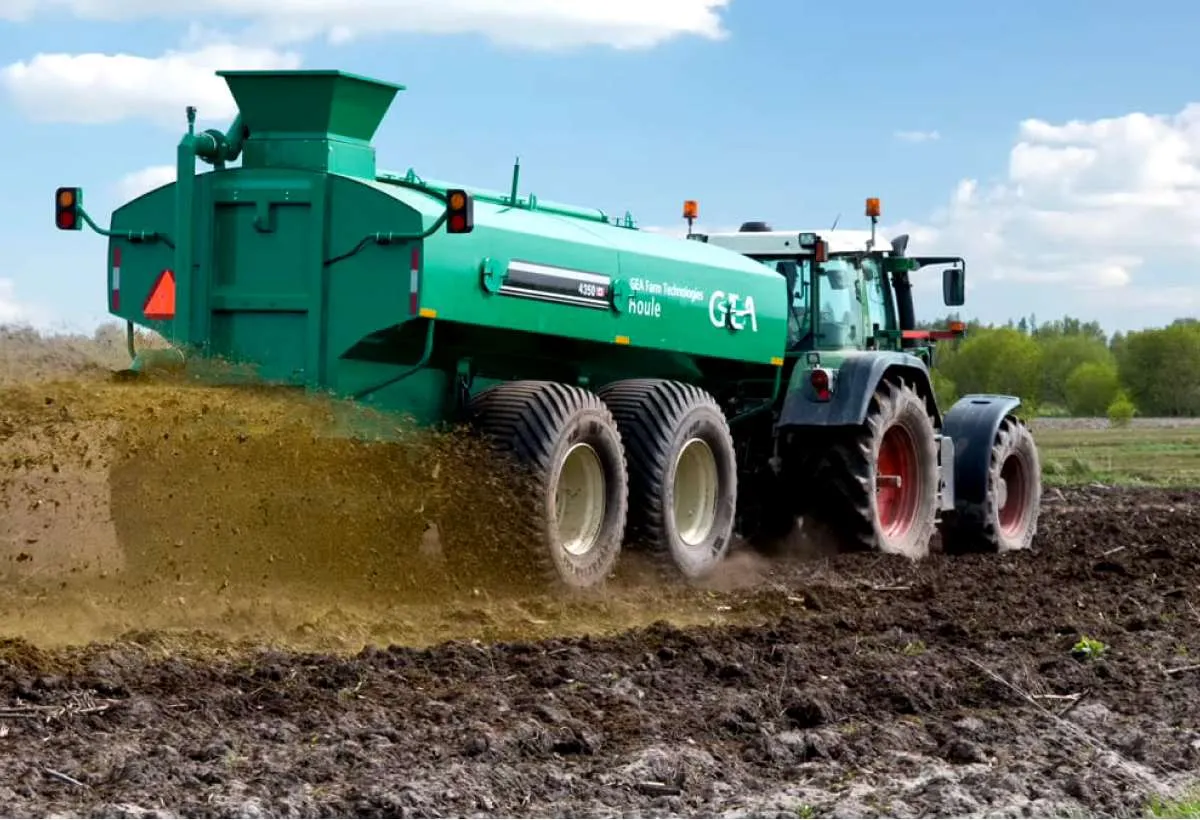
Slurry tankers
These machines are essential for recycling nutrients, improving soil health, and reducing reliance on chemical fertilizers.

A slurry tanker is a specialized agricultural vehicle used to transport and spread liquid animal waste (slurry) onto fields as an organic fertilizer.
Key Functions & Features
- Filling: Most tankers use a vacuum or centrifugal pump system to draw slurry from lagoons or storage tanks.
- Agitation: Some models include internal agitators to prevent solids from settling during transport.
- Construction: Most high-quality tankers are built from 6mm steel and are often galvanized to resist corrosion from the acidic slurry.
- Capacities: Tankers vary significantly in size, typically ranging from 2,000 to 30,000 litres (roughly 450 to 6,600 gallons) to accommodate different farm sizes.
Application Systems
Modern tankers use various attachments to control how slurry is applied, which helps manage odors and nutrient runoff:
- Splash Plates: The traditional method that spreads material in a wide fan shape.
- Dribble Bars: Apply slurry directly to the ground surface in lines, reducing nitrogen loss to the air.
- Trailing Shoes: Use a metal “shoe” to part the grass and place slurry directly on the soil surface.
- Injection Systems: Inject the slurry directly into the soil for maximum nutrient absorption and minimal odor.
Popular Manufacturers
Reliable slurry tankers are available from several specialized manufacturers: please consult us KUTRE EAST AFRICA INDUSTRIES LIMITED